Showing posts with label Garden. Show all posts

Wednesday, May 18, 2011

The Growboxes are here!

For those of you following along, you know this is only my second year involved in vegetable gardening. Last year we grew food over at a friend's property with modest success. The tomatoes were successful as were the eggplants, but root crops ( beets, onions, carrots, and radishes) didn't do so well.

One likely reason is the large amount of stone and gravel in the soil. It was just too much for these crops that I suspect would do well in more friable soil. We'll still use the plot, but I plan on tomatoes, and some vining plants that will take up more space than I have in my little back yard.

Looking at alternative growing methods led me to investigate and begin a Square Foot Garden, which is mostly planted.  Hopefully it will do well. So far so good, and it solves the issue of stones in the soil. It certainly looks nice and organized, but frankly, I am interested in production. That's why I'm growing my own food, to have fresh vegetables and to be able preserve as much of the crop for the non growing season. Controlling my food supply as much as I can while living in suburbia is increasingly important to me, I suspect it is for you too wherever you live.

The third method I want to try are SIPS, sub irrigated planters. I'll be making my own from 5 gallon buckets in the near future and will share the process with you. It seems rather simple. That remains to be seen.

Probably the most famous commercial SIPS in the U.S. are Earthboxes. While this seems like a fine product, there is another product called Growboxes. They are about the same price as the Earthboxes. Both are made from molded plastic, and allow you to water from the bottom. Both websites show outrageously successful results.

In consideration for reviewing Growboxes over the season with you, my readers, the nice folks at The Garden Patch sent me three Growboxes! There is no endorsement yet. Just an honest intent to test them and compare the results with SFG, homemade SIPS, and the in ground veggie plot. Part of the test will be to plant the same tomatoes and peppers in each environment and compare through the growing system.

The results will, in part determine how I proceed in subsequent growing seasons.

I'll be assembling the Growbox in the next few days.

If you have experience with Growboxes or SIPS, I'd like to hear from you.

Stay tuned!

Until next time, Keep Digging & Eat Well!

The Gastronomic Gardener
Garden blog http://amidwestgarden.blogspot.com/
Cooking blog http://ihopeyouarehungry.blogspot.com/
Twitter - www.twitter.com/DavidPOffutt
http://www.facebook.com/TheGastronomicGardener

Saturday, March 26, 2011

Making room for growth

Last weekend I took apart the old garden bed, effectively making two. The thing is, my plans include 2 more 4x8 beds. With this in mind, there is not much room to manuever. Leave it to the Dear Wife to suggest removing the second stair case.

I hemmed, I hawed. I succumbed.

Some pictures are little messed up because I had the white balance set for inside.  I tried to correct for it. Sorry for that.

The stairs that have been there since we built the deck in 2001.


A little crowbar, hammer, and drill gun action and they are out.


A gaping hole, kinda like losing a front tooth!


I patched it up a bit, it still needs the top railing but you can see the two beds better arranged. I'm thinking one more 4x8 box for this year.


I still need to take the side railings off the stairs, we'll likely use the stairs themselves to set containers on.

While I feel pretty good about getting a jump start on this, there is still plenty of cleanup to do in the other beds, but I am ahead of schedule.

Until next time, Keep Digging & Eat Well!

The Gastronomic Gardener
http://www.facebook.com/TheGastronomicGardener

Thursday, March 24, 2011

Potted Seedlings

The last few years, before I got more interested in vegetable gardening, I would start most of my vegetables by purchasing seedlings. There is nothing wrong with that, but it transfers some control over to the big producers.

I want a more hands-on experience, so I've started some from seed this year. A few homemade pots, started a while ago and some new pots started tonight.

Tonight's new starts include:
Hot lemon pepper
Basil
Kung Pao peppers
Cimmaron Lettuce
Sweet bell pepper
Cabbage

No, there are no pictures, no need to show pots of seed starter.

The other sprouts are in the south window of the "sun room" and they seem to be doing well.
They include:
3 kinds of tomato ( Cherry, Roma, Rutgers)
Broccoli
Black Beauty eggplant
2 peppers (Jalapeno, Habenero)


Yes, I'm a little heavy on the chilies and tomatoes, but that is what we eat and preserve.  It may not seem like many seedlings but the Square Foot Gardening method suggests that we don't need as many because we won't be thinning. I like the theory.

While we are out here, I might as well show  you the "sun room." Originally an exterior porch on my little Sears house (circa 1927), this was converted to a three season porch before I bought the house 10 years ago. I ripped out the walls, and added a ton of insulation and  now it is usable year-round. Yes there is a ton of stuff in here. I live here, it's not a show place!


Anyway, there are seedlings growing, but I can't wait to get outside and going on the beets and carrots!

What do you have in little pots waiting for warmer weather?

Until next time, Keep Digging & Eat Well!


The Gastronomic Gardener
Garden blog http://amidwestgarden.blogspot.com/
Cooking blog http://ihopeyouarehungry.blogspot.com/
Twitter - www.twitter.com/DavidPOffutt
http://www.facebook.com/TheGastronomicGardener

Monday, March 21, 2011

Vegetable garden options and the beginnings of a new Square Foot Garden

As I've mentioned over on Facebook, my plan this year is to try several different methods for food production. here is what I'm thinking

1) I've got the big veggie plot over at my friends house. It did pretty well last year, but it is still a hassle to get over there except on weekends.  That can make for some heavy duty weeding when we do get over there. Water is also an issue. Last year we were very fortunate in that we did get pretty consistant rain. But if not, without the homeowners constant attention, which is not very fair to them, we could have some problems dispite the rain barrel setup. We'll likely use a few rows, but not sure how much. This needs to be worked out with the home owner.


2) There is the back yard that is mainly given over to perennials. There was a very small garden (4x7) that last year provided some tomatoes, a ton of basil, and some entertainment as I constructed a hoop house in the spring and fall.


Yesterday, I took about an hour to dig out all the soil, and cut the boxes in half. Now I have two 4x7 beds to use. I'm planning to take out the stairs so I may orient the boxes in a better manner. That's a project for another day


and 3) I'm planning on doing some SIPs (Sub irrigated planters) also known as earthboxes, or utility bucket SIPs. This should be a fun way to check out this method.  Today I purchased a large number of 5 gallon buckets that I'll convert for this purpose (they were on sale)- Watch this space.


Until next time, Keep Digging & Eat Well!

The Gastronomic Gardener
Garden blog http://amidwestgarden.blogspot.com/
Cooking blog http://ihopeyouarehungry.blogspot.com/
Twitter - www.twitter.com/DavidPOffutt
http://www.facebook.com/TheGastronomicGardener

Wednesday, March 9, 2011

Shade structure construction

When I started the yard had very little shade. It was great for most flowers, yet I wanted a shady area to grow some shade plants, hostas and ferns, perhaps some bleeding hearts. With only the west of the garage providing diminishing shade until noon, I decided to build a structure that would extend the shade to a larger area for a longer period.

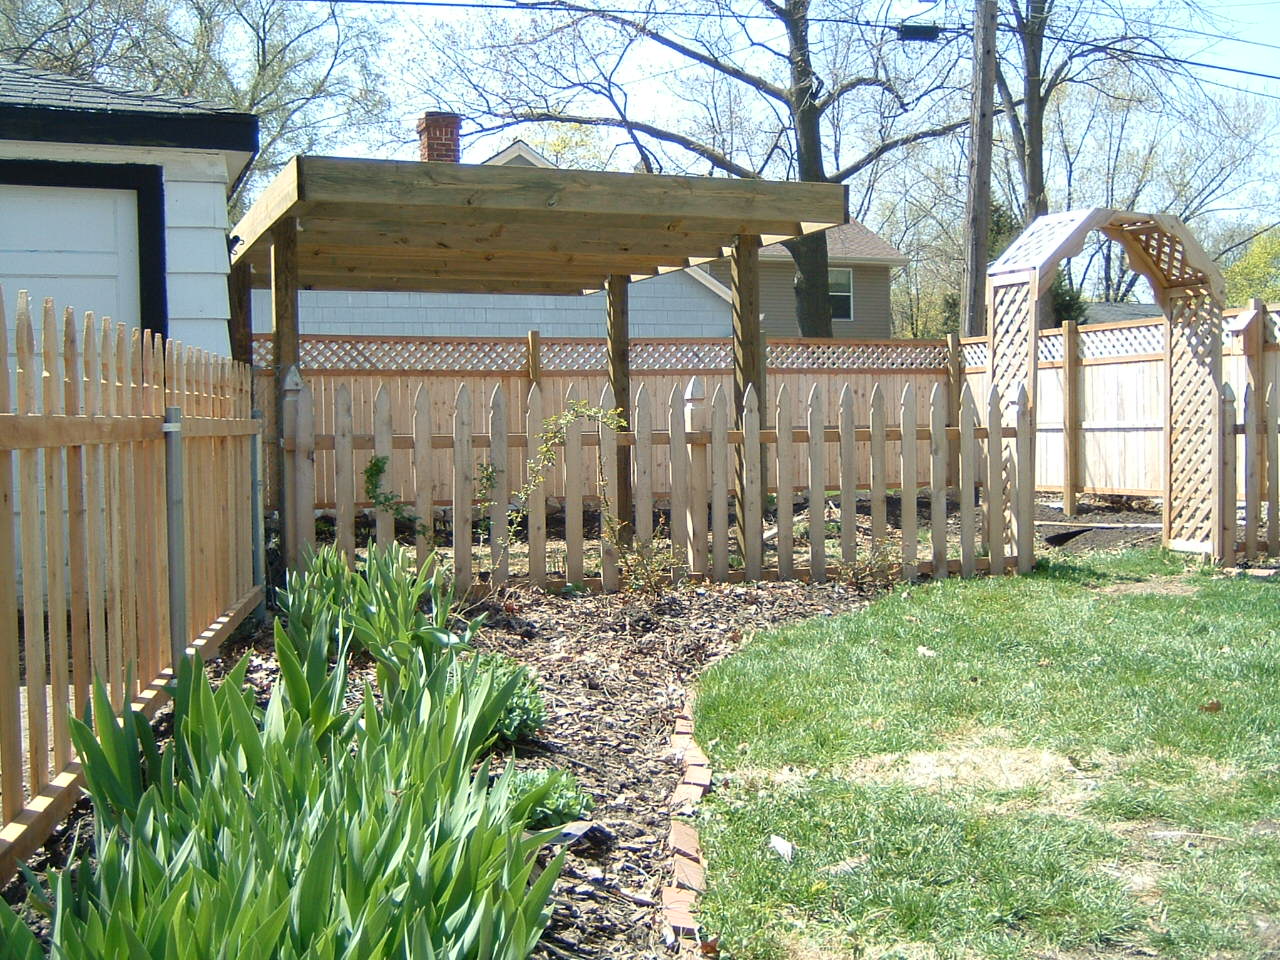
The plan for the shade structure took some time - I wanted it free standing with a lattice top for dappeled light - also I wanted it substantial enough to support vining plants.
 
These pictures date to 2003. Have a laugh at the old fashions!

Sunday, March 6, 2011

Starting some Seeds

It doesn't feel like it, but this is really only the second season that I'm vegetable gardening in earnest.  Clearly I am still learning, and there are many firsts that I'll go through. For example, starting seeds.

Inside.

In March.

We are about 10 weeks before being frost free. I know for others, down south USA or in Britain for example, spring has sprung. But today, it was snowing here.  At  least I can start some seeds, or try to anyway. The microgreens didn't turn out so well, so I'm not completely confident in my success. But for the price of a single plant, I can start multiple plants. I like that.

All winter I've been reading different gardening books, and one that did a good job of showing how to start seeds with not a great deal of effort is The New Victory Garden book by Bob Thomson. While he uses 4" pots, I'm going to recycle some plastic tubs from cottage cheese and yogurt. The idea to split them is my wife's. So she gets the credit for that.

Here we are with the tubs. They were thoroughly washed.


Measure down 2.5 "


Cut while connecting the dots.


One tub + one lid = two potting buckets


Drill holes to allow drainage (and wicking)


10 pots done


Fill with seed starter.


I've got tomatoes, eggplant, broccoli, peppers, celery.


Planted and sitting in a bath - we'll see if it wicks up by morning.


Once moist they go on a heating pad until they germinate.


So we shoud have spouts in a bit of time, then they'll move into the sunny south window.  Follow along, it should be educational.

Until next time, Keep Digging & Eat Well!

The Gastronomic Gardener
Garden blog http://amidwestgarden.blogspot.com/
Cooking blog http://ihopeyouarehungry.blogspot.com/
Twitter - www.twitter.com/DavidPOffutt
http://www.facebook.com/TheGastronomicGardener

Sunday, February 27, 2011

Compost slow cooker

It has been a long time since I've gone over to the veggie patch. However this morning was sunny, and I could use some fresh air. Along with my intrepid wife, we headed on over.

There are two bins, one that we filled last year and stopped in August and the other that we started in August that we'll add to all this coming growing season.


The older pile is on the left. I was not responsible for the mess on the right. We'll get that sorted out in a few weeks. For now let's take a look at the older pile. It looks pretty good.


The piles face south and with warmer (relatively) weather coming I want to crank up the heat to increase decomposition and the destruction of any undesirables that might be in the pile.

An easy way to manage that it to cover the pile with some heavy black plastic. In two shakes of a lamb's tail we got that done.


Now, as the sun shines it'll warm the pile. We'll need to uncover it now and then to water it, or maybe turn, but in about 8 weeks, we should be ready to move it to the beds.

Speaking of the beds, I cut through the barn (saying hello the the chickens!) to go take a look.

They are still covered in snow. Yep, no getting in there any time soon, but as soon at the soil can be worked I'm planning on a rock removal project. The soil is terribly fertile, but loaded with rocks. It's OK for some crops but not so good for root vegetables. I'd like to improve that. Oh, here are the snow covered beds.


As you can see it's not sunny, in fact they are calling for rain, so the sunny morning had given way to a dreary overcast cold and damp afternoon. 

As I stood there, cheeks flushed from the cold, I could hear the  song of a male Northern Cardinal. I couldn't see him at first, but moving slowly I walked in the direction of his call. Neither my eyes nor the camera is good enough to see him in clear focus, but there he was, a bright  red smudge in the drab brown trees. He knows spring is coming.


Until next time, Keep Digging & Eat Well!


The Gastronomic Gardener
Garden blog http://amidwestgarden.blogspot.com/
Cooking blog http://ihopeyouarehungry.blogspot.com/
Twitter - www.twitter.com/DavidPOffutt
http://www.facebook.com/TheGastronomicGardener

Sunday, February 6, 2011

Lilies for low maintenance color and beauty


When I was in the initial stages of planning the perennial garden in 2002, one goal was to have the garden as low maintenance as possible. A choice I made  to that end is to have lilies of various colors and sizes throughout the beds.

Lilies are easy to grow, are steadfast performers year after year, and come in many colors and sizes. While there are many kinds of lilies, one of the more common distinctions for the home gardener is Oriental vs Asiatic. How to tell them apart?

Asiatics face upwards or outwards.

Oriental blooms face down. But so do Trumpet Lilies, of which I have several spectacular specimens.

Asiatics have many leaves and Orientals have fewer.

Asiatics bloom earlier as well, June and July while the Oriental bloom later, July into August.

 For the most part I have Asiatic lilies.


I have a few trumpet lilies. They can grow very large. This plant is easily 6' tall!


While these plants can be expensive, I have found a good way to get them on the cheap. Pick them up late in the year from the nurseries or garden centers after they have already bloomed. Most people don't want to purchase a plain stick that has no blossoms. However, if you are willing to wait until next year, you can often get them at less than half  the original cost. A few time I have purchased lilies that had already been pruned down to about 6 inches. a stick in a pot. But put them in the garden in late summer, early autumn and enjoy the blooms the next warm season.
Make a space in the garden for lilies!


Until next time, Keep Digging & Eat Well!

The Gastronomic Gardener
Garden blog http://amidwestgarden.blogspot.com/
Cooking blog http://ihopeyouarehungry.blogspot.com/
Twitter -  www.twitter.com/DavidPOffutt
http://www.facebook.com/TheGastronomicGardener

Sunday, January 30, 2011

Releasing Roses from Bondage.

About seven - eight years ago, I planted the shrub roses in the back. They were small and tender, but not much to look at. In 2003 they were still quite small and spindly. There they are against the picket fence. Can you see them?


As they grew, they started to need support. When I was still in my apartment in the late 1990's, the house (a second empire style house) next door was being rennovated. That's not the house, just an example of second empire. Note the large curved windows on the first floor.


I was amazed to find beautiful arched storm windows in the trash. I asked the handyman doing the work and he said he was told to throw them out!  At the time I didn't know what I what I would do with them but knew I couldn't let them be discarded. I plucked three from the dumpster, carefully broke out the glass (gasp!) and carted them up to my apartment. There they stayed, leaning up against the wall for a few years.

When I moved to this house, I still didn't know what I would do with them, but they came along and went into the garage.

At first the roses were small and didn't need much support. Here they are in 2003.


As the roses grew, I wanted to give them some structure, so I tacked some wire fencing to two of the frames and installed them to give the growing roses some support.


Well now, fast forward 5 or 6 years and by last year the roses are HUGE! Muscular and tall they have outgrown the supports.


Underneath it all, the powerful canes have destroyed the frame!  I'm pretty sure the roses don't need the support anymore.


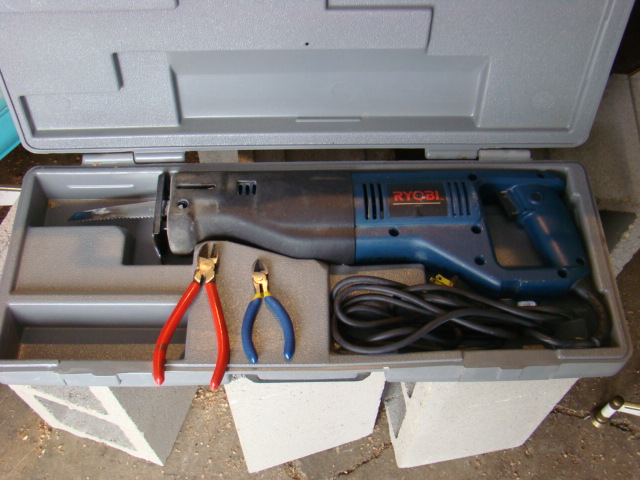
Now in deep of winter, I've decided to disentangle the plants from the support. Today I took care of it.  Not what are normally thought of as "gardening tools."


A bit of wire snipping, and cutting the wood, and the roses are released!


They still need some pruning and cleanup but I'll wait to see when they are more budded out.

Until next time, Keep Digging & Eat Well! 


The Gastronomic Gardener
Related Posts Plugin for WordPress, Blogger...