Showing posts with label West Chicago. Show all posts

Saturday, July 2, 2011

Harvest 7/2/2011 & additional sowing

This isn't that exciting but it helps me keep track...

The harvest this morning:


cucumber - 1st one, the plants are loaded, and I hope to get enough to put up some pickles without having to purchase any.
pepper (Giant Marconi)
carrots
1st beet
spinach
chard and beet greens
Turnips - a little more than 1 lb cleaned and fully trimmed

after cleaning out a few squares, planted more:

Bushbeans (4 squares) for 16 more plants
Chard - 1 square for 9 more plants
Onion sets for green onions - 1 square.

I hope you all had a great Saturday!


Until next time, Keep Digging & Eat Well!


The Gastronomic Gardener
Garden blog http://amidwestgarden.blogspot.com/
Cooking blog http://ihopeyouarehungry.blogspot.com/
Twitter - www.twitter.com/DavidPOffutt
http://www.facebook.com/TheGastronomicGardener

Thursday, June 30, 2011

We Grow Dreams - Aquaponics Field Trip

As part of my reading and research into sustainable methods for personal food production, I have been collecting information about Aquaponics. Aquaponics is the intersection of Aquaculture (raising fish as food source) and hydroponics (raising produce in soil less medium). Both have been around for a long time, aquaculture at from at least 2500 BC, hydroponics dates back to at least the 1600’s, and both have proven to be effective means of food production.

Aquatic animals produce waste (ammonia); in aquaculture utilizing tanks (as opposed to ponds, large cages or nets in open water), some of the water needs to be replaced or filtered in order to keep the water habitable for the fish.

In Hydroponics, plants are raised without soil, a nitrogen rich (and other mineral nutrients) solution is pumped to the root zone. At issue is what to do with the nutrient water once it has been pumped to the plants, it must either be filtered to reuse or in some application is merely discarded

Aquaponics resolves the problems of water replacement in aquaculture and nutrient source in hydroponics. In the simplest terms, the fish poop in their tank, part of the water is pumped at regular intervals into a gravel bed where one bacteria convert the ammonia to nitrites and another converts the nitrites to nitrates, a usable form for the plants growing in the gravel bed. The plants take up the nitrates purifying the water, which then returns to the fish tank. In a perfect system this cycle produces a closed loop, saving water and eliminating the need to purchase fertilizers. Over time, the fish grow large enough to harvest and the produce grows with incredible vigor.

I got lucky. In my town there is a small greenhouse operation, that changed hands in the last few years from a commercial for-profit greenhouse into a new non-profit greenhouse and organization called We-Grow Dreams Greenhouse and Garden Center. Their unique mission is “To provide people with disabilities the opportunity to lead fulfilling lives and to train and work in a supportive, safe and caring environment while producing and providing products and service to the community.”  I drive past this greenhouse on regular basis, so you can imagine my excitement when I saw Aquaponics"" on their marquee by the side of the road!

I contacted them and exchanged emails with Laurie Staple, the Executive Director of We Grow Dreams, and Phil Wolf, a volunteer who is responsible for the Aquaponics program, and we arranged a meeting.

It was a beautiful sunny morning as I headed over to the Greenhouse and Garden Center and met up with Laurie and Phil. Laurie, a retired special education teacher, started the tour in the office. There she explained that the purpose is not to train young people with disabilities how to work in a green house, but rather to provide transferable job skills to a population who are often underrepresented in the work force.

Currently staffed at 45 team members who work 10 hours a month for minimum wage, We Grow Dreams helps team members gain Social Security credits while performing assigned, coached tasks. Greenhouse tasks include straightening up around the retail area, assisting customers carrying materials to their vehicles, and moving product from the production area to the retail area. Out in the yard, gravel was being put down to patch some potholes, as Laurie showed me around part of the five acres.

Laurie told me the main greenhouse dates back to the 1920’s, and on the grounds there is evidence from previous decades. As we walked through "the dirt room" with an ancient dirt machine used to fill pots, I commented how hot it was. Laurie pointed out that the room was used in the dead of winter, and they ran a kerosene heater to warm it up. Quite a difference six months makes.

While we were walking from one house to another, Laurie indicated they receive no state or federal funding, so volunteerism and donations are critical to the success of the organization. After we circled back to the main green house where the Aquaponic set up resides, Laurie handed me off to Phil, an engineer by trade, and We Grow Dreams volunteer spearheading the Aquaponics project.

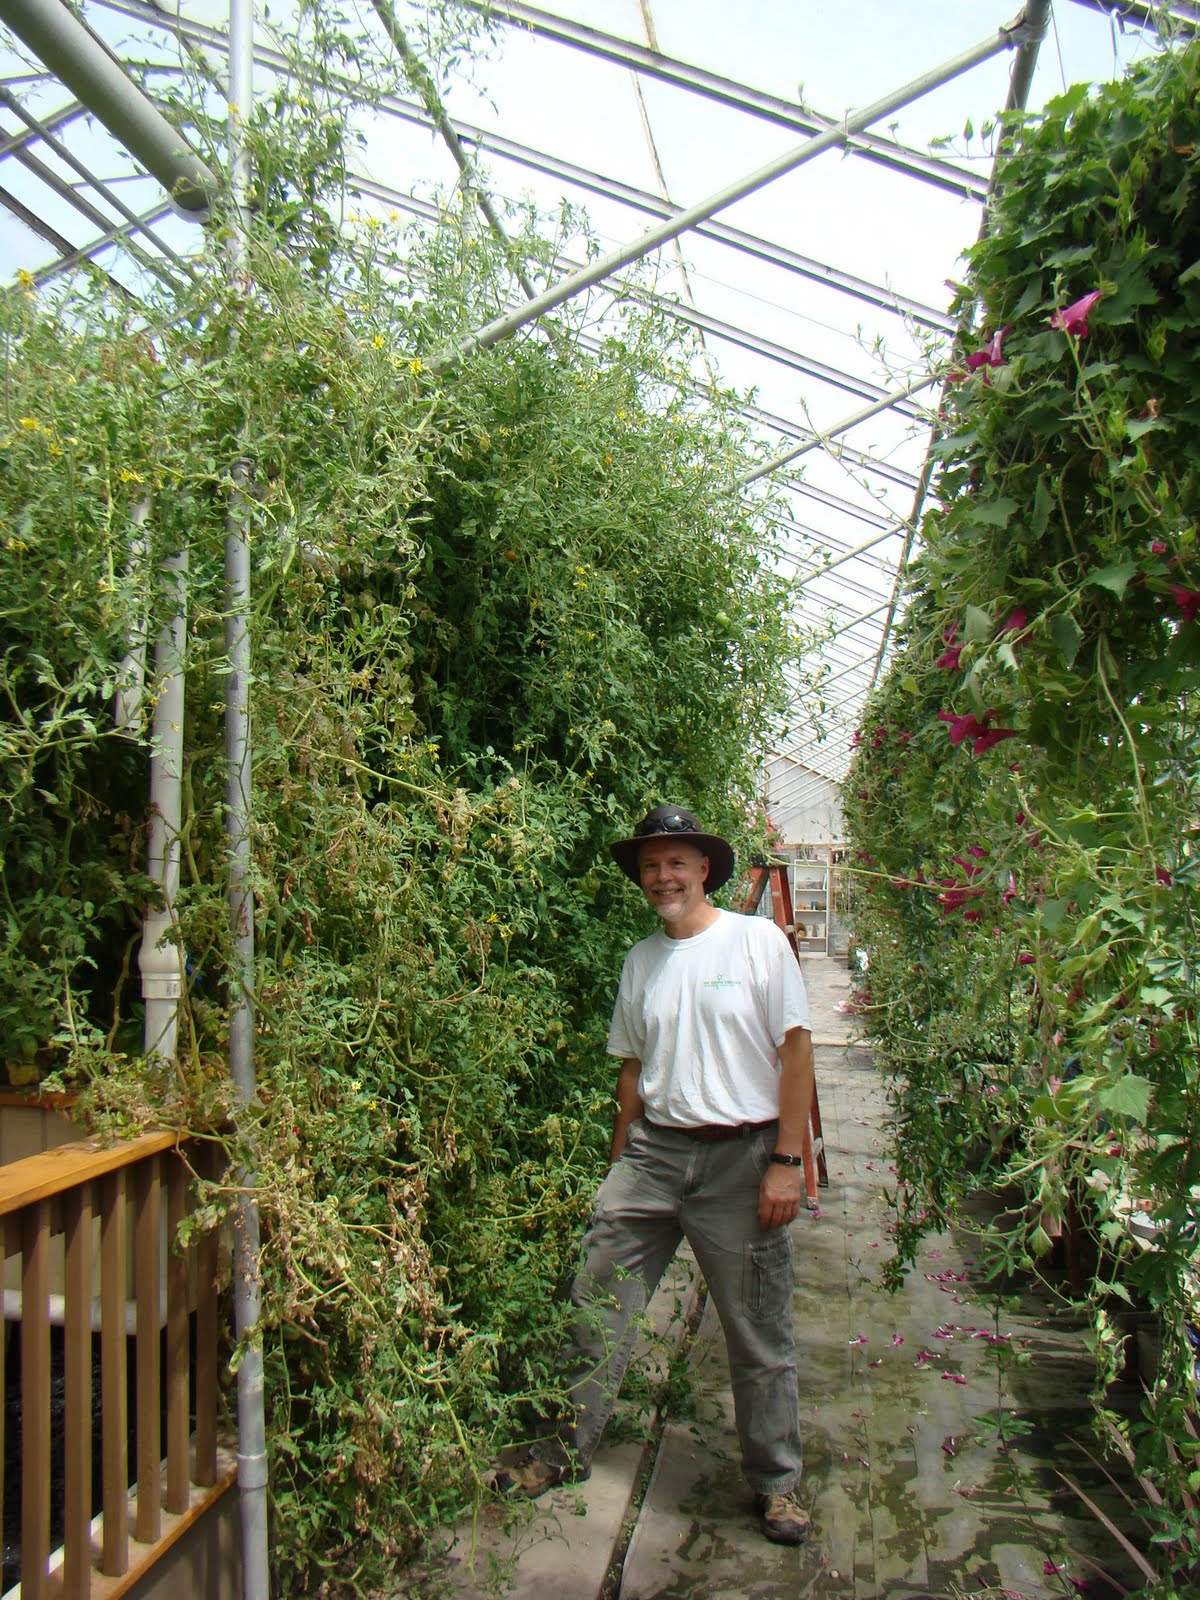
Here he is next to the tomato plants. Granted, the plants start a little higher than waist high but this is crazy! The sheer mass of plants is a little overwhelming.


Here's a shot from the other side.


I asked Phil how many plants this is. "I'm not sure, maybe five."


Five? Really? 

I was a little stunned as Phil sat down and started doing his tests on the chemical analysis of the water.  It's important to keep track of the health of the system so regular monitoring of ammonia, nitrate, nitrite, and oxygen saturation is important. While he performs the tests he gave me the  run down - a 1000 gallon fish tank holds about 375 bluegill and some goldfish.  This tank supplies the nutrient rich water for the system.

Here is a shot from the other side where two volunteers had just finished cleaning out a  couple gravel beds. Water is pumped from the fish tank (located under the gravel beds holding the tomato plants to the left of Phil)  to the gravel filled grow beds that hold the giant tomato plants. You can see the down pipe that feeds the watering pipes.


After running through the gravel beds where helpful bacteria breakdown the ammonia and waste and the plants take up what they can use, the water runs to a 3500 gallon raft tank.

A raft tank is a large tank of water with Styrofoam or polystyrene insulating boards floating on top. Holes are cut into the boards and small mesh pots are set into the holes. A small amount of rooting material (often expanded clay) is used and plants are placed in the mesh pots. Their roots grow into the water in standard hydroponic method. Here is basil in the foreground and lettuce at the other end. These plants extract yet more nutrients from the water before it is returned to the fish tank


Here it is from the other side. The lettuce looks really healthy!


If you have any doubts about root development, check this out!


The addition of the large raft tank adds stability to the system. Fluctuations in temperature and water quality take much longer when there is almost 4500 gallons of water involved.

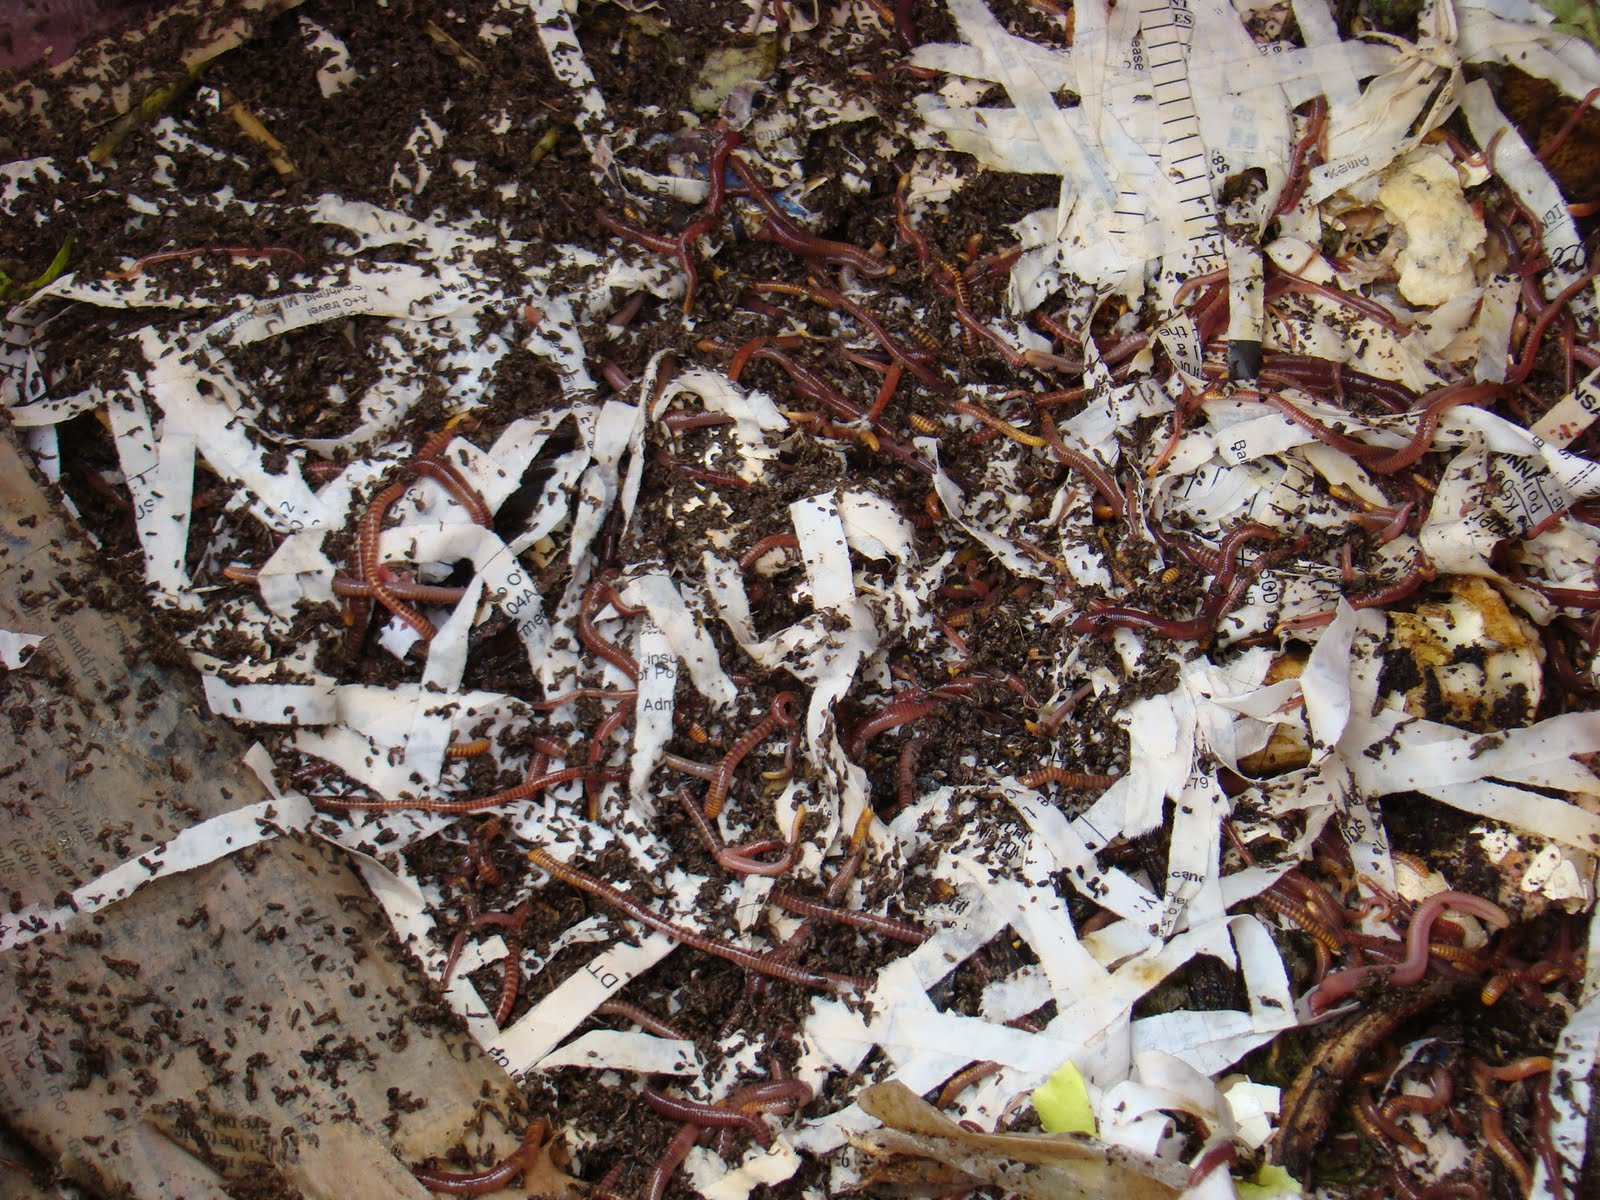
One final bit, Phil is also practicing vermiculture, starting with 1 lb of worms  back in January, there are now many times that in the gravel beds and other installations he is involved in. He keeps them busy in a worm bed located under one end of the gravel beds feeding them kitchen scraps.


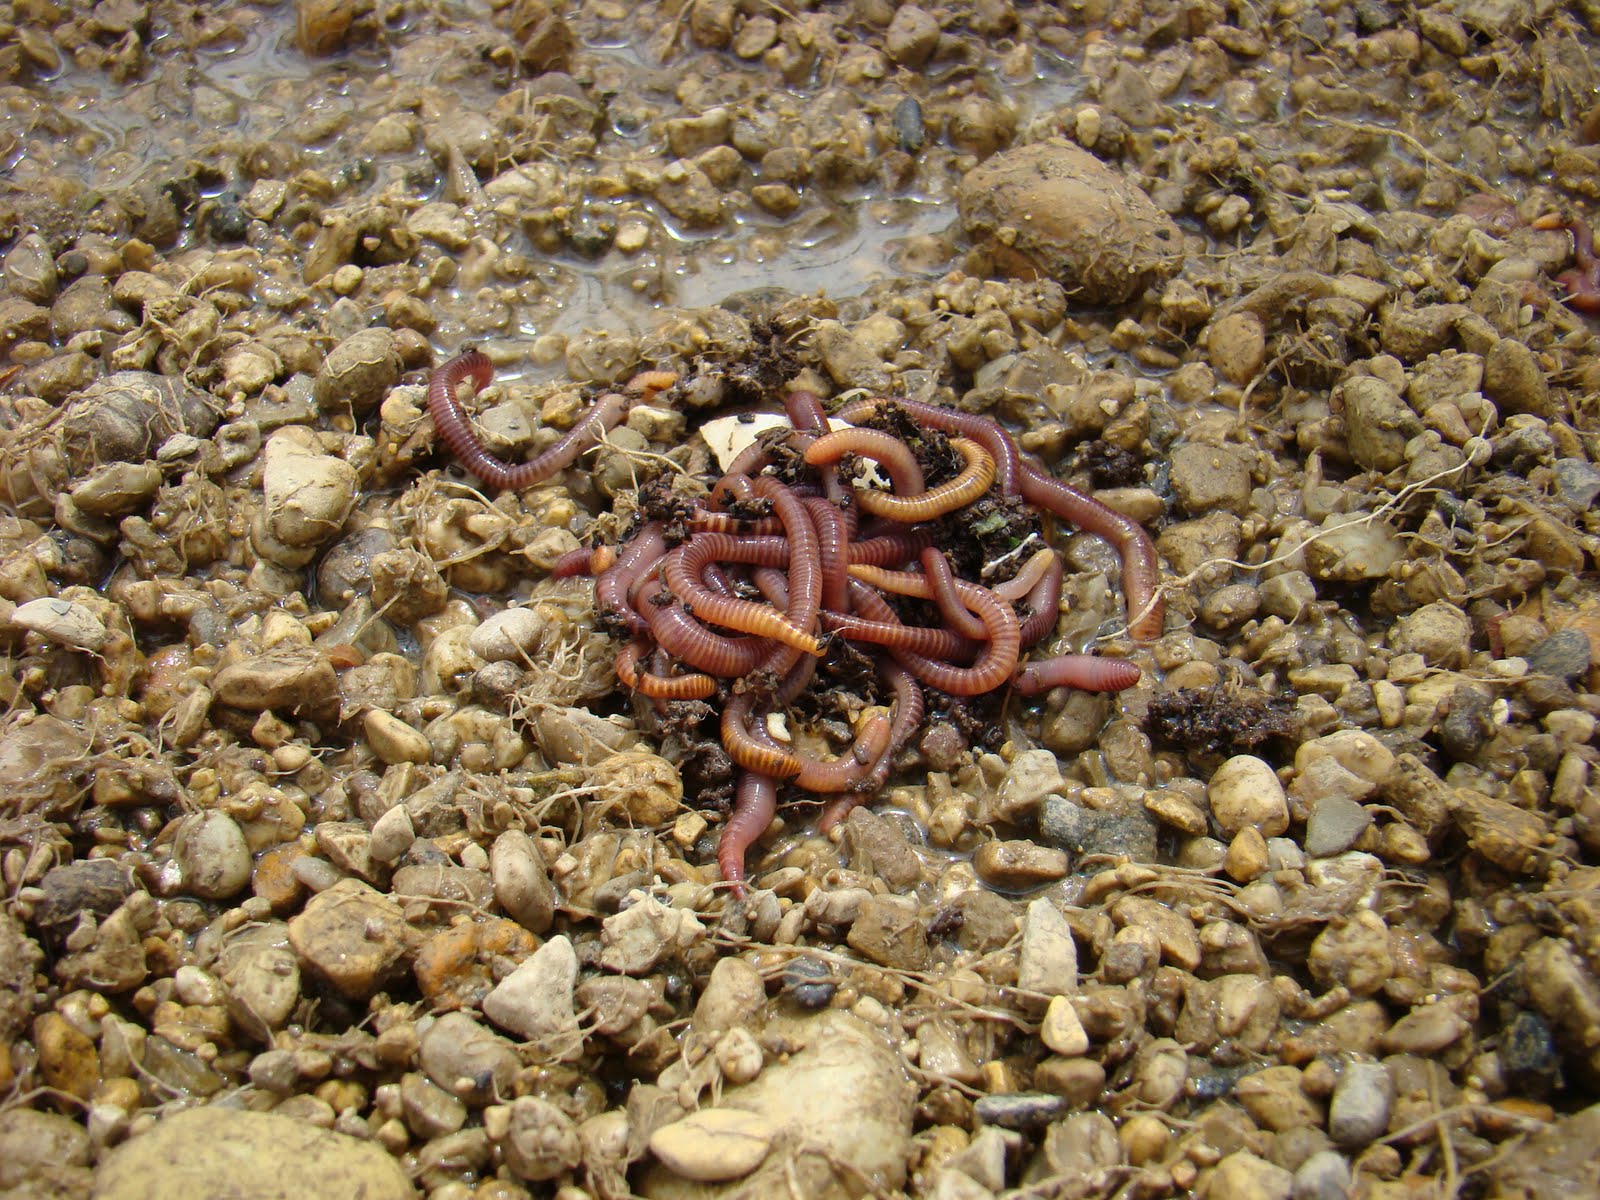
As a fun demonstration, he put a small amount of worms from the worm composting bin into the gravel grow bed. In just one minute (I timed it) they went from this...


to this.


The worms easily crawled down between the spaces in the gravel. They also consume organic material and contribute their own rich nutrients to the grow beds.

To close our conversation Phil indicated he is in the process of writing up a six month review and analysis of the installation. He openly acknowledges this is a learning process and while there has been some trial and error, looking at the results they are on the right path. There is more to do and learn.

I was very happy to get an up close look at an operating system. As I said at the beginning of this (long) entry, I am interested in this system for personal use in the future. This was a great first exposure to a live system and I am very grateful to Laurie, Phil, We Grow Dreams Greenhouse and Garden Center for allowing me to come and visit,  they were very generous with their time, and their mission is a noble one.

I know I'll be back to check on their progress and to pick Phil's brain a bit more.


For more information about We Grow Dreams, feel free to contact them at: info@wegrowdreams.org

Phil Wolf may be contacted at pwolft3@gmail.com

If you are interested in additional links and information about Aquaponics, let me know and I'll share what I have.


Until next time, Keep Digging & Eat Well!


The Gastronomic Gardener
Garden blog http://amidwestgarden.blogspot.com/
Cooking blog http://ihopeyouarehungry.blogspot.com/
Twitter - www.twitter.com/DavidPOffutt
http://www.facebook.com/TheGastronomicGardener

Friday, May 6, 2011

It all can't be fun and games

I  have a fence that surrounds the entire back yard, and while the panels are getting within a year or two of replacement, but there is one post that rotted through at ground level - it must not have good drainage. I've been meaning to replace it since last summer, but just got around to it now. It is held in place with some parachute cord.


Some bricks to prop up the panels so they don't drop when I remove the screws.


So that's what the neighbor's yard looks like!


The concrete cap came up much easier than I could have hoped for. That perfectly sized hole might come in handy later.


Digging a hole is not so bad, unless you are digging around a post.


Some time later - I'd removed enough materiel to pull the post, and, thankfully I knew where to put the new one.


Three hours after starting, the post is replaced, the hops ripped out, and the panels replaced. I even used all the same hardware I took off. I'll be sore tomorrow!


These hops roots are huge, and I'm sure I didn't get them all.


Two days left to finish the remaining beds, I may actually get done before going back to work. It's been a nice vacation.


Until next time, Keep Digging & Eat Well!

The Gastronomic Gardener
Garden blog http://amidwestgarden.blogspot.com/
Cooking blog http://ihopeyouarehungry.blogspot.com/
Twitter - www.twitter.com/DavidPOffutt
http://www.facebook.com/TheGastronomicGardener

Wednesday, March 9, 2011

Shade structure construction

When I started the yard had very little shade. It was great for most flowers, yet I wanted a shady area to grow some shade plants, hostas and ferns, perhaps some bleeding hearts. With only the west of the garage providing diminishing shade until noon, I decided to build a structure that would extend the shade to a larger area for a longer period.

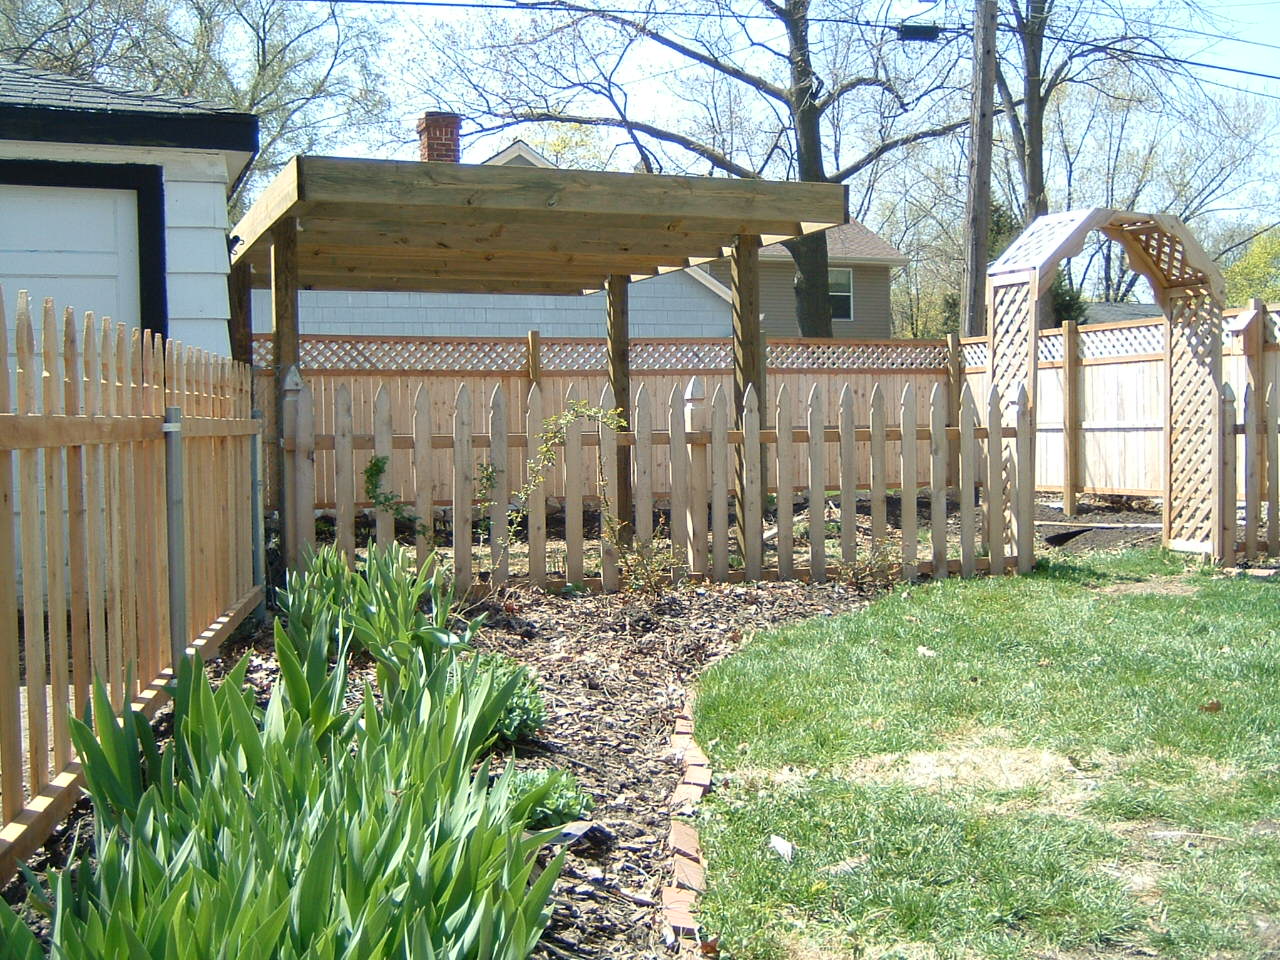
The plan for the shade structure took some time - I wanted it free standing with a lattice top for dappeled light - also I wanted it substantial enough to support vining plants.
 
These pictures date to 2003. Have a laugh at the old fashions!

Thursday, March 3, 2011

Defeated by tiny little greens, microgreens in fact

I don't like to admit failure but there comes a time when it is just not worth keeping up the fight. The microgreens just didn't do what a) I expected them to, or b) do it fast enough. I've had enough expereince growing things, these suckers were just too slow. They had moisture and light, but never seemed to get going.

In the end they smelled bad. I don't want to eat that!

I take full responsibility, they didn't fail, I failed them. I'm pretty disappointed but then again, a meal did not depend on them, they were going to be a pretty garnish for goodness sake.

I'll try again sometime, or just focus on the coming spring.  Failure is OK as long as you learn from it.

Until next time, Keep Digging & Eat Well!

 The Gastronomic Gardener
Garden blog http://amidwestgarden.blogspot.com/
Cooking blog http://ihopeyouarehungry.blogspot.com/
Twitter - www.twitter.com/DavidPOffutt
http://www.facebook.com/TheGastronomicGardener
Sunday, February 6, 2011

Lilies for low maintenance color and beauty


When I was in the initial stages of planning the perennial garden in 2002, one goal was to have the garden as low maintenance as possible. A choice I made  to that end is to have lilies of various colors and sizes throughout the beds.

Lilies are easy to grow, are steadfast performers year after year, and come in many colors and sizes. While there are many kinds of lilies, one of the more common distinctions for the home gardener is Oriental vs Asiatic. How to tell them apart?

Asiatics face upwards or outwards.

Oriental blooms face down. But so do Trumpet Lilies, of which I have several spectacular specimens.

Asiatics have many leaves and Orientals have fewer.

Asiatics bloom earlier as well, June and July while the Oriental bloom later, July into August.

 For the most part I have Asiatic lilies.


I have a few trumpet lilies. They can grow very large. This plant is easily 6' tall!


While these plants can be expensive, I have found a good way to get them on the cheap. Pick them up late in the year from the nurseries or garden centers after they have already bloomed. Most people don't want to purchase a plain stick that has no blossoms. However, if you are willing to wait until next year, you can often get them at less than half  the original cost. A few time I have purchased lilies that had already been pruned down to about 6 inches. a stick in a pot. But put them in the garden in late summer, early autumn and enjoy the blooms the next warm season.
Make a space in the garden for lilies!


Until next time, Keep Digging & Eat Well!

The Gastronomic Gardener
Garden blog http://amidwestgarden.blogspot.com/
Cooking blog http://ihopeyouarehungry.blogspot.com/
Twitter -  www.twitter.com/DavidPOffutt
http://www.facebook.com/TheGastronomicGardener

Sunday, January 30, 2011

Releasing Roses from Bondage.

About seven - eight years ago, I planted the shrub roses in the back. They were small and tender, but not much to look at. In 2003 they were still quite small and spindly. There they are against the picket fence. Can you see them?


As they grew, they started to need support. When I was still in my apartment in the late 1990's, the house (a second empire style house) next door was being rennovated. That's not the house, just an example of second empire. Note the large curved windows on the first floor.


I was amazed to find beautiful arched storm windows in the trash. I asked the handyman doing the work and he said he was told to throw them out!  At the time I didn't know what I what I would do with them but knew I couldn't let them be discarded. I plucked three from the dumpster, carefully broke out the glass (gasp!) and carted them up to my apartment. There they stayed, leaning up against the wall for a few years.

When I moved to this house, I still didn't know what I would do with them, but they came along and went into the garage.

At first the roses were small and didn't need much support. Here they are in 2003.


As the roses grew, I wanted to give them some structure, so I tacked some wire fencing to two of the frames and installed them to give the growing roses some support.


Well now, fast forward 5 or 6 years and by last year the roses are HUGE! Muscular and tall they have outgrown the supports.


Underneath it all, the powerful canes have destroyed the frame!  I'm pretty sure the roses don't need the support anymore.


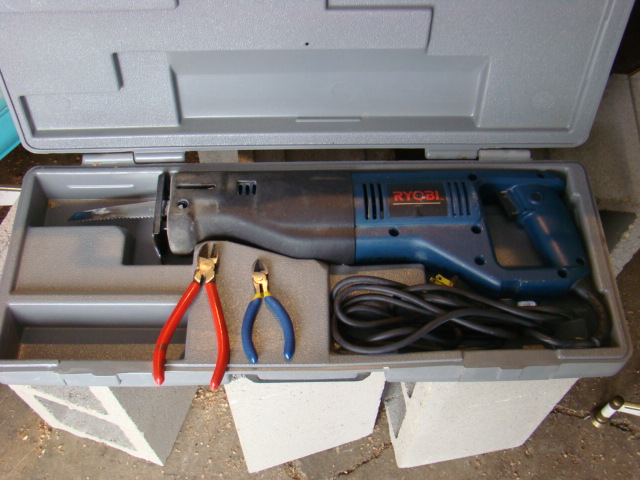
Now in deep of winter, I've decided to disentangle the plants from the support. Today I took care of it.  Not what are normally thought of as "gardening tools."


A bit of wire snipping, and cutting the wood, and the roses are released!


They still need some pruning and cleanup but I'll wait to see when they are more budded out.

Until next time, Keep Digging & Eat Well! 


The Gastronomic Gardener
Related Posts Plugin for WordPress, Blogger...