Thursday, April 29, 2010

Make your bed!

So we keep on keeping on. Now was time to make the beds. The plan is to make seven 3'x15' beds separated by 2' wide paths.

Here is the planning grid.


The shaded area are the paths, unshaded the beds. I want raised beds so we will shovel the paths and move the material to the bed on the right. This should create raised beds of decent material.
 
My friend was able to identify what likely broke the tines off off the tiller. A steel 2' i-beam mounted vertically in a column of cement. It took me about 15 minutes of shoveling and sledging with an 8 pound maul until I was able to get it out of the way. I guess you'll never know what you will find.
 
Anyway, with the tiller repaired, we went over the plot again. More rocks! It's amazing, I wonder if somewhere there is the former landowner laughing in their grave, maybe we're trying to till a former driveway.  The bed although rather small definately has diffent soil within its boundries, while a large portion is very nice the upper center section is extremely rocky and primarily clay. Having had good luck amending soil before, I turned to adding peat to the plot. We added 12 2.2 cubic foot bales of peat moss - that's 26 cubic feet of fluffy goodness.
 
We tilled that extra material in and then it was time to start shoveling the paths. Ugh! Rows 2 and 3 were brutal. That's right - more rocks. The homeowners wife paid me a compliment -"You are so systematic about setting up garden beds".  - Yes, yes I am.  Hopefully the work will produce (ha a little veggie humor for ya!).  We kept at it, digging paths putting the material on the bed to the right.
 
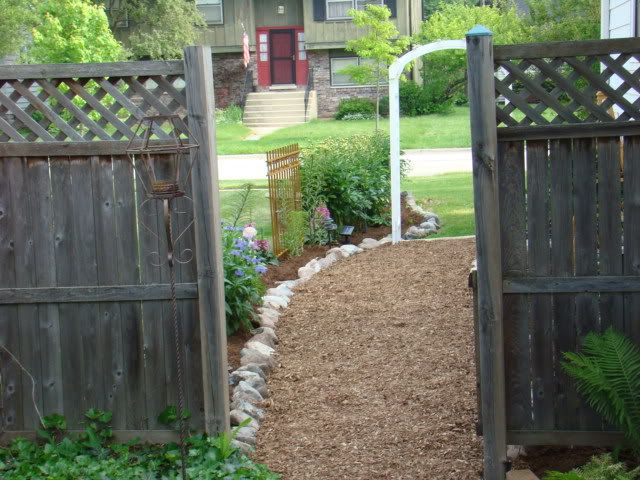
On the paths we put wet newspapers which we will then cover with straw - the theory being keep weeds  and mud at bay on the paths as well as being compostable at the end of the season
 
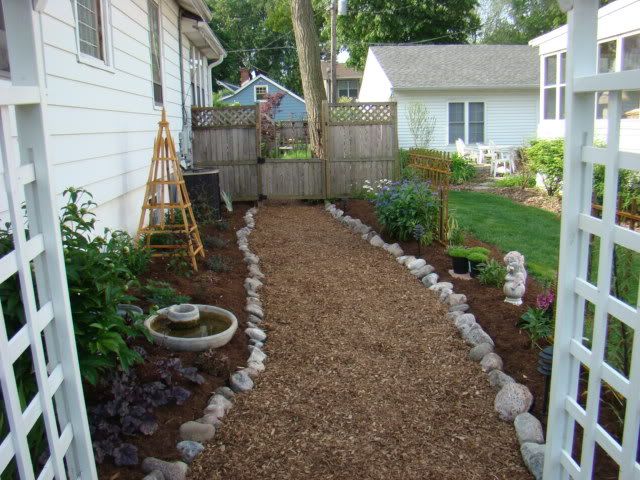
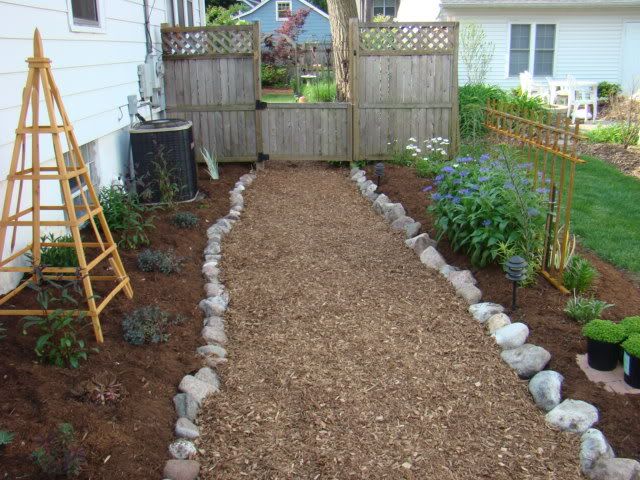
Finally we persevered and here are the results, I love it when a plan comes together.


Looks pretty good to me! See those blue barrels? - Another project - rain catchment!
 
Until later Dear Reader. Comments? Complaints? Suggestions? Requests?

Monday, April 26, 2010

OK, Now the veggie plot is turned

Sunday went over to the veggie plot, a light rain was falling. I love the rain as long as it isn't torrential. The way the earth smells, the cleanliness of the air. Yep, rain is a good thing. But I digress. We needed to till and till we did, and pick rocks and more rocks.

The plot ends up being 15' x 35". The dirt is much better quality than I expected, and full of earthworms.
Here it is from the west.

It's dirt right? But it's NICE dirt, black, rich with a bit of clay along the fence line which we'll be able to help out this year with peat, and then compost in the future. The copost heap will be another post. I know, it's positively riveting!

Nice dirt.

Nice bits of organic matter. Did I mention that in previous years this was part of a horse pasture, now vacant for a few years? It was and should prove beneficial to the garden.

From the east.
Wouldn't be country life without a non functional car in there somewhere! But you can see the dirt is pretty fluffy  and certainly is black.
Alas, we did have casualty - other than the worms we bisected - the poor tiller snapped off just as we were beginning the second pass. We need to get it welded back.
 
Our trusty steed took one for the team.

OUCH!

I figure we got about 20 gallons of small rocks, and a few hundred pounds of bigger ones which will be repurposed in other parts of the hosts yard.

So we need to add peat, mark and create the rows, set up irrigation and plant all in the next 2 weeks. Shoud be fun!

Until later Dear Reader...

Sunday, April 18, 2010

Well not so much

Went over to look at the veggie plot and yes it is flailed but it is not nearly deep enough, will need to be tilled and rocks picked multiple times. That said it is a decent size for the first attempt. I think we will need to add a few bales of peat as well as some seasoned horse poop. It wasn't worth taking pictures....

Until later Dear Reader...

The Veggie plot is turned.

Ok - we're about to go over to the group garden location in Winfield. It's on private property so I won't say where exactly.

Yesterday it was all turned - a neighbor has a tractor with a "flailer" - so I'm told we're tilled to about 8-10". Plan is to make 2'-3' rows with 2' between. If we dig down the 8" for the paths we can mound that up in the rows for raised beds. Line paths with newspaper and straw to keep the mud down.

Also have to set up the irrigation system. I obtained 3x55 gallon barrels we'll set up for rain catchment.

Oh and the tilled area is quite rocky so we'll do some rock picking today too. The soil however is old pasture, so what dirt is there is fertile from years of horse poop.

Stay tuned!

Saturday, April 10, 2010

Peony supports and a quick walk around the yard

As promised, and I'm sure you are on pins and needles with anticipation, we take a look at some peony supports that work quite well and take a look at a few pictures from the yard today.

The hoops that you see in the garden center are fine of you have isolated plantings. But for a hedge of peonies, the hoops just won’t work well. I got tired of the bushes flopping over when they are heavy with blossom, especially after a good thunderstorm. It never seems to fail, just at the height of the bloom a big storm rolls through and knocks them all down.

This simple support system really performs well, I use wooden stakes and vinyl cover wire mesh – it’s about 2x3 holes in the fence. I pound the stakes in the ground and simply slide the mesh over the up to about 18” from the ground. This allows the plants to grow through it and will hide the supports by the time they bloom.

Also, it is pretty handy to have the plants through the supports. When they dry you can just use your garden trimmer and cut them off under the support. I was lazy last year and left the supports up all winter so that is where we start.


Not sure what happened but this one fell over.

So after cleaning it up it looks like this.

It's not very pretty but it works. By June you won't be able to see the support system at all, and, when it rains the plants will not all collaspe.

So while I was out I took a few more pictures.

The magnolia is looking pretty. I don't know how everyone feels about daffodils popping up throught the lawn but I like it.


Here we are in the back  the bleeding hearts coming up next to lungwort in full flower.

Clearly I need to rake out the beds. And here are some early ferns unfurling.


Helleboris or Lenten rose.
And lastly some hops. Beastly plant but fun to grow.

 
I still have a great deal of work to do to get it cleaned up, but it is growing - looks like most everything survived the winter. The large amount of snow probably helped.
 
Until later....

Wednesday, April 7, 2010

Vegetable Hoop House

So I am trying something new this year, a hoop house over the vegetable box. The vegetable box is quite small - only 4' x7'. But I thought I could get a jump on the lettuce and green onions.

In previous years we've grown with decent success tomatos, cilantro, basil, and eggplants. Last year the eggplant did not do so well. Not sure why, maybe too crowded?

The purpose of the hoops house is to protect the plants from cold, excessive pounding rain which is common this time of year, and to heat the soil up.

After putting up the hoop house I put in a high-low thermometer. It got up to 110 degrees on a sunny 55 degree day! But it didn't do that well in keeping it warm. Perhaps the hoops are too big?

Construction was very easy, I spent 5 x $.89 for the 1/2" x 10' pcv pipe, I already had the clear plastic, the clamps (big binder clips), the 1/2" emt (electrical) conduit guides, lumber, tape and hinges.

So here are the pictures, it's not fancy, but effectiveness trumps aesthetics.


The lettuce and onions are in - and just in time - the torrential rains of the last days would've made a mess of the delecate plantings. I'll keep you posted.  Next up, peony supports, and not those hoops things that they sell - well OK I do use them for two plants that are isolated but not for the long solid bed.
Until later Dear Reader...

Sunday, April 4, 2010

2009 - a new side garden and a color riot!


OK, so I couldn't justify going through 2006-2008 - really more of the same, just bigger. A few plants did fail. After a few years of covering the arch and the shade structure the silver lace just did not come back. I've replaced it with hops - Caution - unless you have a place for them to go, avoid hops they are super aggressive!

The yellow iris that came from the Batavia House with me are petering out - they need some transplanting and centering again - they have wandered into the sedum.


And the Hops grow vigorously up the shade structure.


I haven't shown you much from the shady area against the garage - here are some ferns and hostas.


It's just  very peaceful back there.
We were very fortunate this spring to come into some river rock free for the hauling. I was on that faster than a hobo on a chicken dinner! The west side of the house had always been neglected. I took some time off work and used the rock to define and edge the beds. I also had enough to edge around the magnolia out front. Take a walk with me.


So there is a little tour of the side garden. I really like the way it pulls you into the back garden and your eye travels all the way to the japanese maple.

The roses were spectacular again last year.


The peonies performed well again. As I've mentioned they came with the property even if I didn'y know they were here when I bought the place. I've also worked out the staking methond - both effective and discrete.
On to the lilies! Always liked them and they come in so many forms and colors. Always interesting.
And now the final few before I wrap up 2009.
And so we'll wrap it up now. I am sure there are other pics, I know I am missing the Knockout roses, the lupine, the sedum and a few others. Oh well there is always this year!

If you have any questions of comments, I'd love to hear from you.

Related Posts Plugin for WordPress, Blogger...