Monday, May 30, 2011

Monday Walk-About

Yesterday we got about 4" of rain as measured in a 5 gallon bucket. Today it's going to be 90! I went out early to do some weeding and "smartening up" as Mark would say.  I made good progress but there is still much to be done.  There are some fine things in a garden after a good soaking (drowning?)

The west side is one of my favorite views of the garden,  a small arbor down the path, my crooked gate, another arbor and the Japanese maple. I like the way it pulls you in.


This tangle of color has variegated Iris, Shasta Daisy and bachelor buttons. The iron fence I rescued from scrap last year. I got 4 panels. They weigh a ton! Had them professionally stripped and now they are left to aged gracefully in the garden.


Through the gate and on the left, the clematis is spectacular!


Down  the path (don't look to the right, the ivy bed is a disaster!) and into the back. A different perspective of the Squarefoot garden.


The roses are late, but will come in their own time.


Finally two guardians, one in the sun, one in the shade.  The hermaphoditic sun god from the Dominican Republic faces east to greet the rising sun.


And this little fellow from Limburg Germany is up to something, but he's apparently somewhat nervous.


I'm off to the in-laws to drop off some tomato seedlings...

Until next time, Keep Digging & Eat Well!

The Gastronomic Gardener
Garden blog http://amidwestgarden.blogspot.com/
Cooking blog http://ihopeyouarehungry.blogspot.com/
Twitter - www.twitter.com/DavidPOffutt
http://www.facebook.com/TheGastronomicGardener

Friday, May 27, 2011

Transforming the Garden, aka Get rid of the lawn!

As you probably know, I converted most of my tiny patch of lawn  in the back to a Square foot garden.  Sadly, it looks rather tatty, and needs to be spruced up.  One goal is to eliminate any lawn whatsoever back there.  It's a joke to try and mow, and now that the boxes are there, it would be a pain in the neck.

Here we are before....


A layer of weed cloth, and the edging bricks dug out of the ground. They've sunken in quite a bit in seven. years.


Finished with a layer of mulch. it'll compact once it rains. No more mowing!


It took from 8:00am until 2:30 this afternoon, but so worth it.  What do you think?

Off to the Butcher Shop!


Until next time, Keep Digging & Eat Well!


The Gastronomic Gardener
Garden blog http://amidwestgarden.blogspot.com/
Cooking blog http://ihopeyouarehungry.blogspot.com/
Twitter - www.twitter.com/DavidPOffutt
http://www.facebook.com/TheGastronomicGardener

Wednesday, May 25, 2011

Wordless Wednesday - Iris in bloom and other Beauties


Until next time, Keep Digging & Eat Well!

The Gastronomic Gardener
Garden blog http://amidwestgarden.blogspot.com/
Cooking blog http://ihopeyouarehungry.blogspot.com/
Twitter - www.twitter.com/DavidPOffutt
http://www.facebook.com/TheGastronomicGardener

Tuesday, May 24, 2011

In just one day

Though it was cool today with all the rain and the sun, in just one day the beans all popped! I went out to look this morning and nothing. 12 hours later? It's always a fun part of gardening, the surprise, and wonder at new life.


Until next time, Keep Digging & Eat Well!

The Gastronomic Gardener
Garden blog http://amidwestgarden.blogspot.com/
Cooking blog http://ihopeyouarehungry.blogspot.com/
Twitter - www.twitter.com/DavidPOffutt
http://www.facebook.com/TheGastronomicGardener

Monday, May 23, 2011

Happy Blossoms

All this talk about vegetables and food production is grand, but my first love in gardening is the perennials. I poked around a little bit the other day, and snapped some pretty blossoms. 

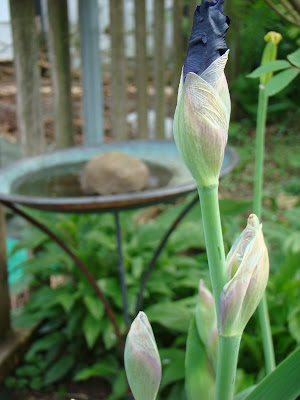
I can't wait for this big iris to bloom.
gastronomic gardener This is a picture of an iris bud prepared to pop in a midwest garden


And this one I've had for years, it moved with me. These are blooming in a clump that I did not thin last summer. The ones I thinned are much smaller. They need some time to bulk up.
gastronomic gardener This is a picture of an iris in a midwest garden


First Clematis!
gastronomic gardener This is a picture of an clematis in a midwest garden


Bachelor Button or corn flower. The tight buds remind me of pineapples. This self seeds, um aggressively.
gastronomic gardener This is a picture of clematis in a midwest garden


Columbine and Shasta Daisy.
gastronomic gardener This is a picture of columbine in a midwest garden

gastronomic gardener This is a picture of shasta daisy in a midwest garden


And finally the Spring Star Flower. A late spring bulb that is beautiful.
gastronomic gardener This is a picture of spring star flower in a midwest garden


Until next time, Keep Digging & Eat Well!

The Gastronomic Gardener
Garden blog http://amidwestgarden.blogspot.com/
Cooking blog http://ihopeyouarehungry.blogspot.com/
Twitter - www.twitter.com/DavidPOffutt
http://www.facebook.com/TheGastronomicGardener

Sunday, May 22, 2011

Setting up at the veggie plot.

Last year was all about the veggie plot, and we still have the location to share with the homeowner. So far all my attention has been to the Square foot garden and the Growbox, but that changed today. The homeowner had the garden turned  and screened to get some of the rocks out. It is much smoother than last year.

We do need to put straw down in between the rows and tidy up a little but all in all it is in good shape.


I put in three tomatoes (Celebrity, Roma, and Black Prince) to compare against the SFG and the growboxes.


Since both the homeowner and I are growing our own plots, (they want theirs nearer to the house), we've decided this plot can be used for sprawling vining plants - zucchini, watermelon etc.

To help keep the vines off the ground and to provide easier maintenance, I used some of the concrete wire from last year and made little lean-tos.


Here is detail of how I attached the mesh to the stakes - just drill a hole in the top of the stake, and use a zip tie to secure it. The bottom floats against the bed.


I'll slide over there again today and get a few plants in.

Until next time, Keep Digging & Eat Well!


The Gastronomic Gardener
Garden blog http://amidwestgarden.blogspot.com/
Cooking blog http://ihopeyouarehungry.blogspot.com/
Twitter - www.twitter.com/DavidPOffutt
http://www.facebook.com/TheGastronomicGardener

Saturday, May 21, 2011

It's (almost) Summertime and the thinning is easy

In a Square Foot Garden thinning is easy. Unlike the directions on the seed packets there is no sow, then thin to the proper spacing. We've already sown to the proper spacing, but we did place 2-3 seeds per spot.

You do need to thin, but pulling up the ones you want out could disturb the seedling you want to keep. What to do?

OFF WITH THEIR HEADS!

Have your own little French revolution right at home, of course without the rioting mobs, blood, and the incessant thump of a guillotine blade doing its job. No, a simple snip will do the trick.

My weapon of choice, my trusty Swiss Army Knife. The blades are small enough to get in and delicately do the dirty deed.


Here are two squares planted with turnips, they are in need of thinning. It's a bit hard to tell but there are 32 spots planted, 16 per sf.


Doing the deed.


Six minutes later and that's better!  There are still a few spots  that I will have to come back to, but at least there are now 32 distinct spots.


Off to the remote veggie plot!


Until next time, Keep Digging & Eat Well!

The Gastronomic Gardener
Garden blog http://amidwestgarden.blogspot.com/
Cooking blog http://ihopeyouarehungry.blogspot.com/
Twitter - www.twitter.com/DavidPOffutt
http://www.facebook.com/TheGastronomicGardener

Thursday, May 19, 2011

Growbox assembly

Tonight after work, I put together the Growboxes.

The parts: Top and bottom and cover with fertilizer strip.


The fertilizer is attached to a sheet that covers the potting mix (not potting soil) and also has a handy numbering system for plant spacing. The instructions tell you which numbers to use for different plants.

Snap the top and bottom together.


Now looking into the box, the tabs are bent down, this forms the wicking chamber.


Bend those tabs down and pack firmly with potting mix.


Fill the box halfway and water thoroughly.


Fill completely and water again. Add plants per the instructions. Tomatoes are two per box, I planted Romas and Celebrity. They are already in the square foot garden, and I have two more to put in the veggie plot. The instructions say to use small plants, these are not so small. Hopefully that will not be an issue. Yes it was dark by the time I finished. You can see one of the fertilizer strips on the right.


Add the cover, and fill the well.


One is done, the other two await residents. I'll get to that this weekend.


Until next time, Keep Digging & Eat Well!

The Gastronomic Gardener
Garden blog http://amidwestgarden.blogspot.com/
Cooking blog http://ihopeyouarehungry.blogspot.com/
Twitter - www.twitter.com/DavidPOffutt
http://www.facebook.com/TheGastronomicGardener

Wednesday, May 18, 2011

The Growboxes are here!

For those of you following along, you know this is only my second year involved in vegetable gardening. Last year we grew food over at a friend's property with modest success. The tomatoes were successful as were the eggplants, but root crops ( beets, onions, carrots, and radishes) didn't do so well.

One likely reason is the large amount of stone and gravel in the soil. It was just too much for these crops that I suspect would do well in more friable soil. We'll still use the plot, but I plan on tomatoes, and some vining plants that will take up more space than I have in my little back yard.

Looking at alternative growing methods led me to investigate and begin a Square Foot Garden, which is mostly planted.  Hopefully it will do well. So far so good, and it solves the issue of stones in the soil. It certainly looks nice and organized, but frankly, I am interested in production. That's why I'm growing my own food, to have fresh vegetables and to be able preserve as much of the crop for the non growing season. Controlling my food supply as much as I can while living in suburbia is increasingly important to me, I suspect it is for you too wherever you live.

The third method I want to try are SIPS, sub irrigated planters. I'll be making my own from 5 gallon buckets in the near future and will share the process with you. It seems rather simple. That remains to be seen.

Probably the most famous commercial SIPS in the U.S. are Earthboxes. While this seems like a fine product, there is another product called Growboxes. They are about the same price as the Earthboxes. Both are made from molded plastic, and allow you to water from the bottom. Both websites show outrageously successful results.

In consideration for reviewing Growboxes over the season with you, my readers, the nice folks at The Garden Patch sent me three Growboxes! There is no endorsement yet. Just an honest intent to test them and compare the results with SFG, homemade SIPS, and the in ground veggie plot. Part of the test will be to plant the same tomatoes and peppers in each environment and compare through the growing system.

The results will, in part determine how I proceed in subsequent growing seasons.

I'll be assembling the Growbox in the next few days.

If you have experience with Growboxes or SIPS, I'd like to hear from you.

Stay tuned!

Until next time, Keep Digging & Eat Well!

The Gastronomic Gardener
Garden blog http://amidwestgarden.blogspot.com/
Cooking blog http://ihopeyouarehungry.blogspot.com/
Twitter - www.twitter.com/DavidPOffutt
http://www.facebook.com/TheGastronomicGardener

Sunday, May 15, 2011

Setting out plants in the square foot garden

The seedlings in the sun room, are puny compared to the offerings at the store. Since I really only was successful with tomatoes and peppers, I proceeded to purchase.. tomatoes and peppers, and eggplant and a few herbs.

The east bed is planted, sans a few squares, and the other starts are placed. The taller peppers and eggplanst are placed in west and north squares to reduce shading of other plants.


An overview...


I also crawled into the rose bushes (very slowly) and tied up some of the canes to "smarten" the roses up a bit.


I have a surprise for you in the next post, stay tuned!


Until next time, Keep Digging & Eat Well!

The Gastronomic Gardener
Garden blog http://amidwestgarden.blogspot.com/
Cooking blog http://ihopeyouarehungry.blogspot.com/
Twitter - www.twitter.com/DavidPOffutt
Related Posts Plugin for WordPress, Blogger...